This post is waaay out of date, so I am a bit /shocked/ that people are still reading it. Before diving in please read Braid's comment below. Consider it an 'Errata' for the outdated stuff in this post, mainly because I'm too lazy to update it ;-)
*Note*
This assumes the CDT is already set to use the MinGW GCC toolchain and that the devkitPro development tools have been installed
The project we will be building is from the first tutorial of the excellent Nintendo DS Homebrew Tutorials site found here. Go to tutorial 1 and download the demo1.zip to your desktop. A direct link is here. Extract the files to your desktop, but do not do anything with them yet, first we have to setup Eclipse.
If you have not already setup your system for using devkitPro, the tutorials site above also has instructions on how to do this.
To setup an Eclipse project for NDS homebrew development do the following:
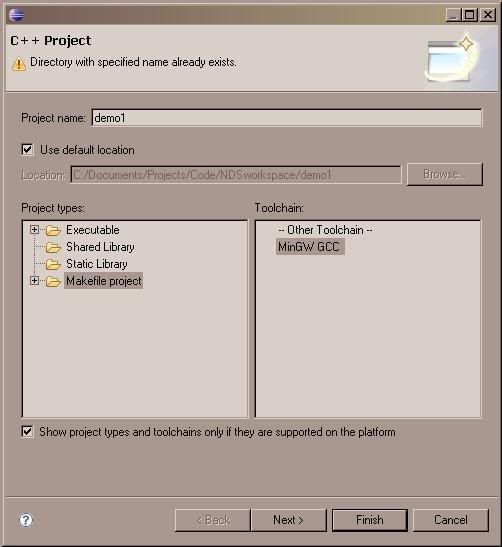
1. Create a new C++ Project
2. From "Project Types" select Makefile project
(the root folder only, NOT the Hello World C++ Project)
3. From "Toolchain" make sure MinGW GCC is selected
4. Click Finish
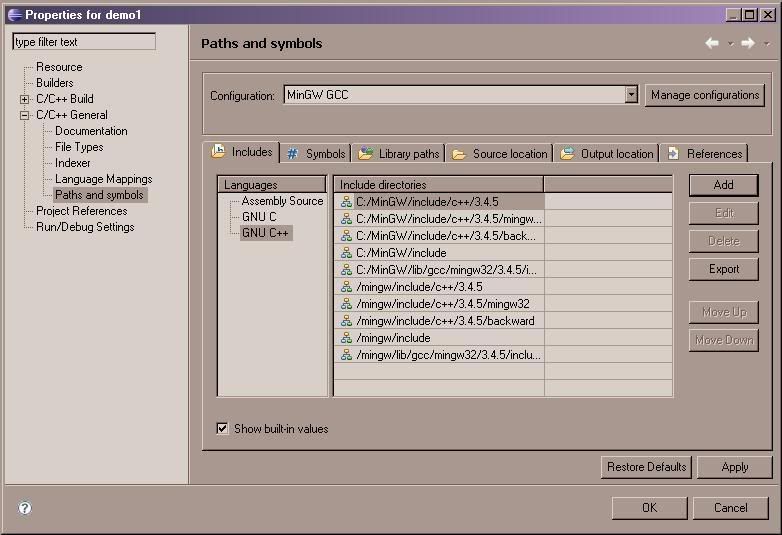
5. The Eclipse CDT only automatically imports the MinGW libraries by default so we have to manually link to the NDS header files. From the main menu select Project --> Properties
6. Expand C/C++ General and select "Paths and symbols"
7. Under the "Includes" tab select GNU C++
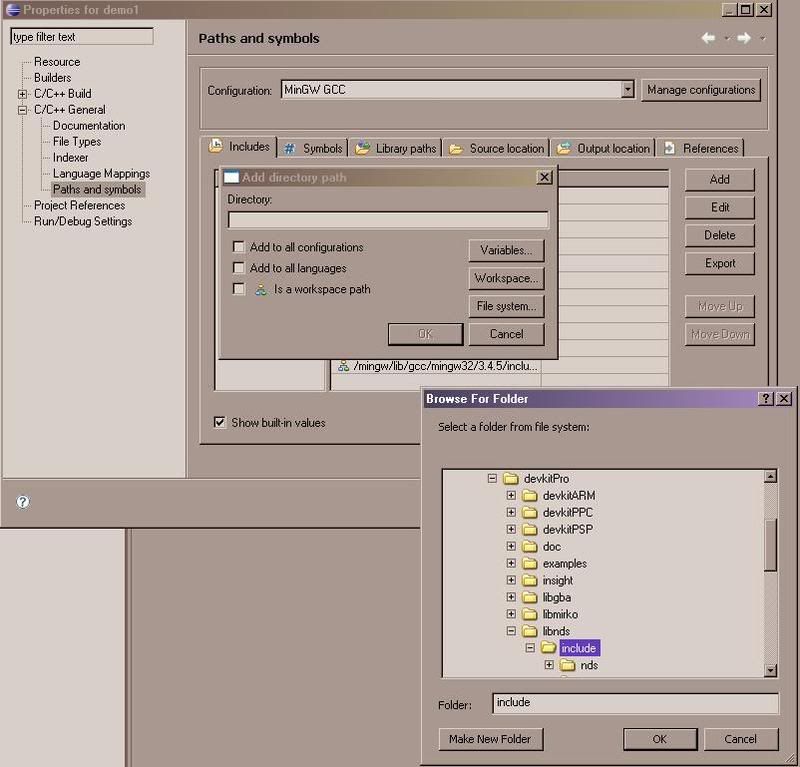
8. Click Add and then click Filesystem. Browse to where the the libnds directory has been installed (usually C:\devkitPro\libnds\ assuming you installed devkitPro to the root of C) and select the include folder
9. Click OK and then OK once more to add the directory
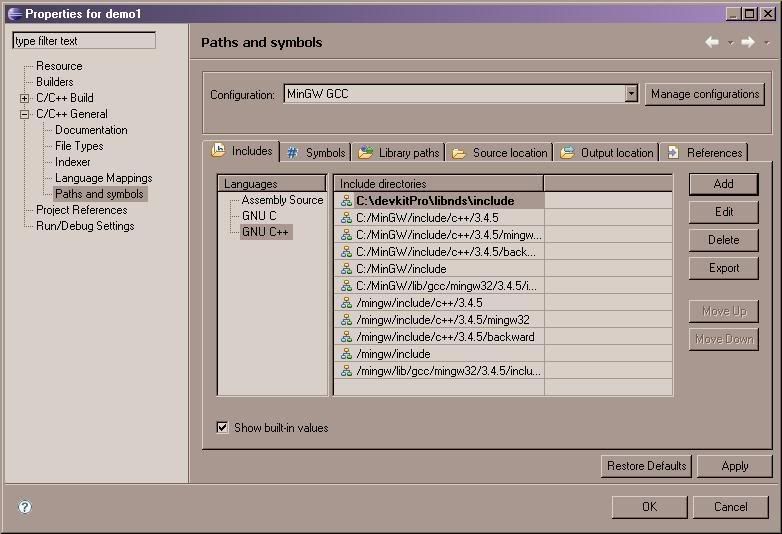
10. You should now see C:\devkitPro\libnds\include listed as one of the Include directories. Click Apply to save the changes
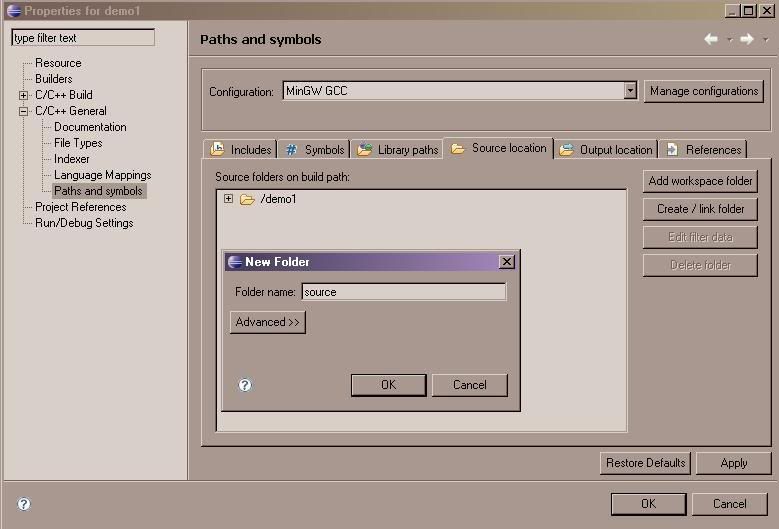
11. Still in the "Paths and symbols" window select the Source location tab. Click Create / link folder and in the New Folder dialog type "source" and click OK
12. Now select the /demo1 folder and click Delete folder to remove it. All of our source files will go into the demo1/source folder. Click Apply
13. Finally select the Output location tab. Repeat steps 11 and 12 but instead of "source" call the new folder "build"
14. Apply the changes and click OK to exit the Properties window
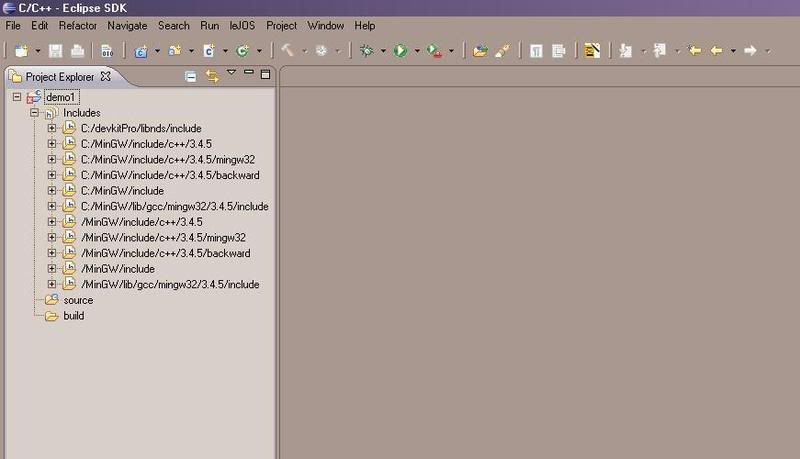
15. In your demo1 project folder you should now see a source folder and a build folder as well as the link we made to the libnds library listed in the Includes
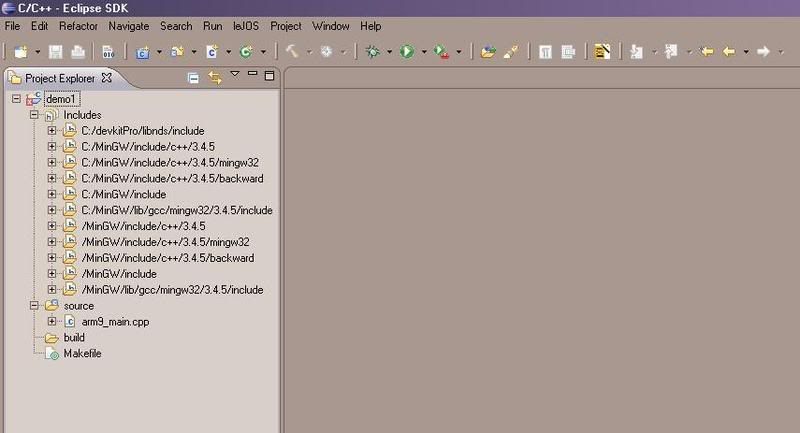
16. Now we're ready to start importing files. Go to the demo1 folder you extracted to your desktop. Find the "arm9_main.cpp" file in the source directory. Drag this file to Eclipse and drop it in the source folder of our project.
17. Likewise find the Makefile in the demo1 folder, drag this to Eclipse, but instead place it at the root level of our project by dropping it on the demo1 project folder
18. Do not worry about the compiled demo1.nds in the extracted demo1 folder, as we will be compiling our own
19. If we try to build the project now, we'll get the following output:
**** Build of configuration MinGW GCC for project demo1 ****
make all
make: *** No rule to make target `all'. Stop.
The reason for this is that the CDT by default tries to use a Makefile's all: target commands (i.e. how to build any and all source files found). However the Makefile we are using does not specify an all: target, therefore we have to remove the all target from the CDT's build options.
20. Once more go to Project --> Properties (*Note if Properties is inaccessible make sure that the root project folder is selected)
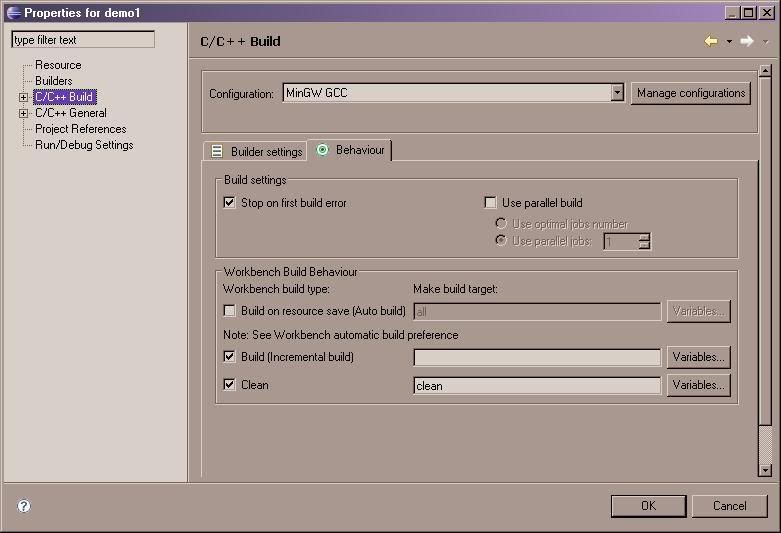
21. Select "C/C++ Build" and then select the Behavior tab
22. Towards the bottom of the window find the Build (build incremental) field and clear it (but do not disable it). Click Apply and then OK to exit.
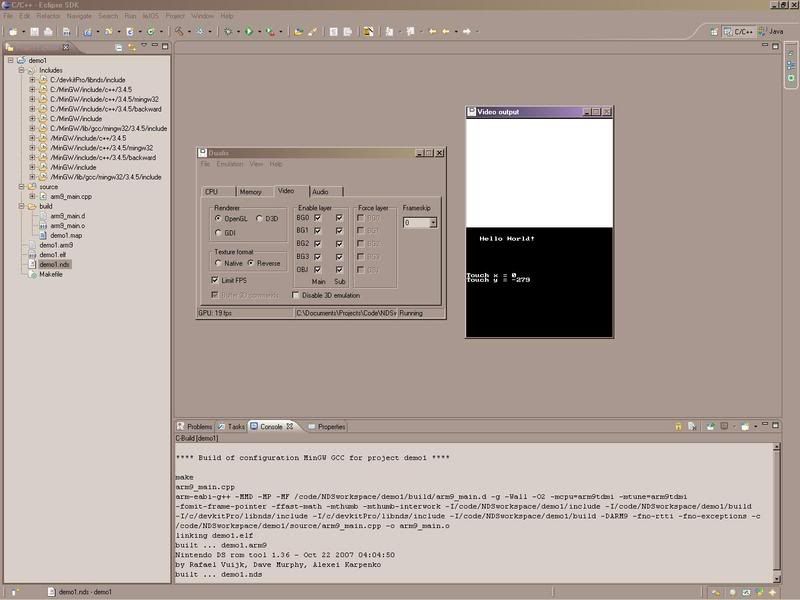
23. Eclipse will now auto-build the project using the make commands specified in our Makefile. You will probably notice that several files get generated, but the one we're really interested in is the demo1.nds file. This is the executable that will run on the DS. However, since transferring a program to the DS everytime you want to test it can be tedious, let's run the program using a DS emulator like Dualis
24. Download and install Dualis, making note of where the Dualis .exe can be found
25. To run the .nds file using Dualis right click on demo1.nds and select Open With --> Other. Now click Browse and find the Dualis.exe file. Finally click OK to run the program using Dualis. Note that it may take several seconds to load the first time. If the program runs you've successfully setup your environment!
A few additional notes:
-Whatever you name your project is what the compiled .nds will ultimately be named, as the Makefile uses the root directory when naming the executable
-To permanently set .nds files to open with Dualis (or another Emulator), find any .nds file in windows explorer, right click, select Open With, choose your emulator, and check Always use the selected program to open this kind of file. Once this is set you can double click a .nds
-It doesn't matter what you name your source files, as the Makefile is smart enough to link and compile whatever is in the source folder